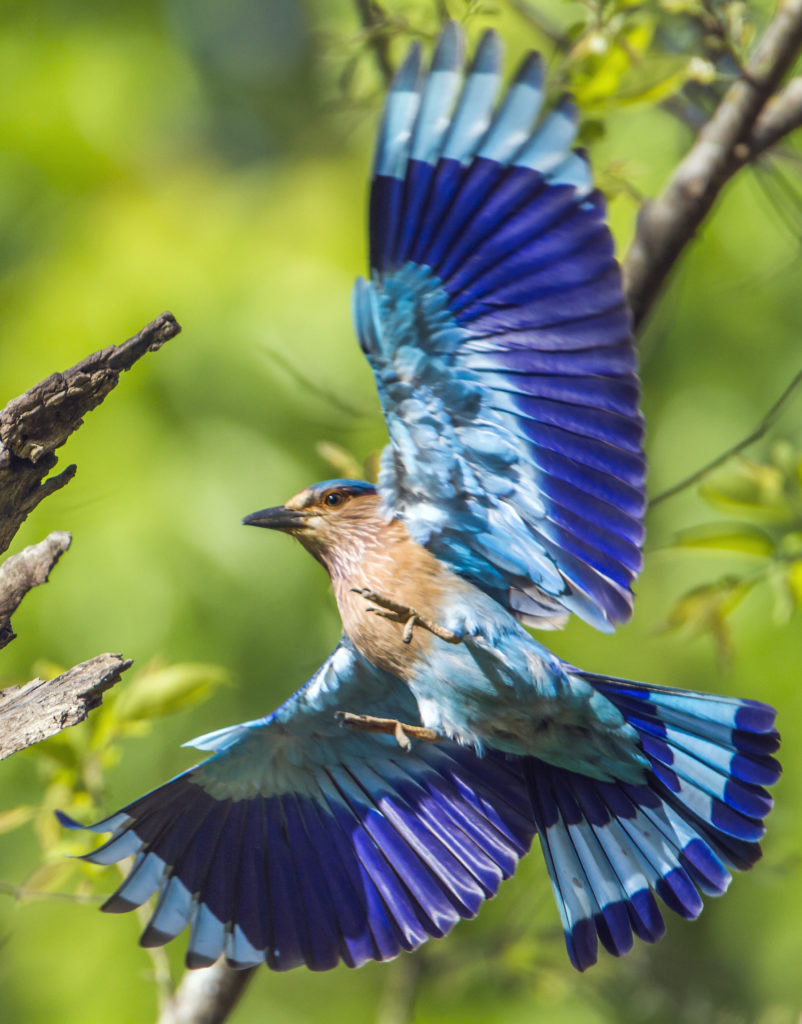
How to use Spiral Fill to create a realistic Bluebird design from a photo
You asked and we will deliver, let’s break down this beautiful bird design, created mostly with theSpiral Fill Element.
Digitizing from a photo
Sometimes as a digitizer, you receive a photo of fauna or flora (trees or birds) that are specific to an area, this might apply to golf clubs, resident’s associations, or similar.
The customer may want to build a logo or design around the image they provided.
This bluebird photo offers us a perfect opportunity to digitize something truely unique.
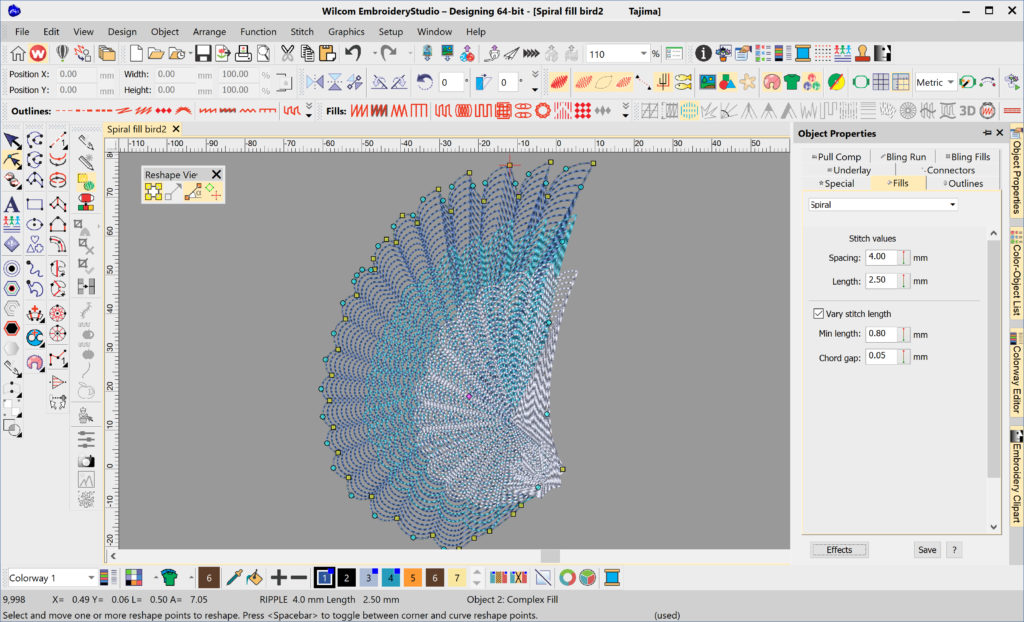
TheSpiral Fill Elementis selected here because it will help uscreate a sense of movement.
How to control the Stitches
Boundary Points
To create movement, one of the mostimportant aspect is to digitize the boundary,which are the control points.The first layer of the wing uses Spiral fill with a 4mm spacing, the next smaller layer is also opened up to a 4mm spacing. The third and final layer of the wing uses a 3mm space.
Centre Node
Experiment with the centre node to locate the epicentre of the feathering, and create the effect you are after.
How to add Texture
Layers
To create a realistic object, we needlayersof open stitches that create incredible texture in our bird design.
Colors
The colours used in the feather layers, will also help create the wing effect. Here we use shades of blue.(Usually tones of colors work best to achieve light and shade of an object).
Look over our shoulder as we use Spiral Fill to digitize a beautiful bluebird from a photo